Showing posts with label motorcycles. Show all posts

Monday, March 18, 2019

Adventure Series: Jennings State Forest (Part 1)

If you do not have a motorcycle capable of operating off road, take caution if you choose to attempt this ride.

Jennings State Forest is a little strange, but it is also one of my favorite places to ride. Looking at Jennings on a map, one notices how large it is and that there are two clear(ish) sections of trails within it. These sections are separated by Yellow Water Creek. Logic would say that they would still be connected by a small bridge or something, right? Wrong! The trails in the west side of Jennings are isolated from the east side. There's no easy way to get from one to the other even though the closest trails for each respective section are separated by what I estimate to be approximately less than 1,000 ft. Logistically speaking, creating a path that brings the two together would make a lot of sense even for the Forestry Service. There are trails that look like they would be good paths to get from one side to the other, but you'll get stopped by gates in the process and it can be rather frustrating since it prevents one from making a nice loop when trying to organize a ride.

But I digress. While the trail arrangement may be a little less than ideal, there's still plenty to be happy about with these areas. Since I've visited the west section of Jennings the most, I'll start with that as a Part 1.

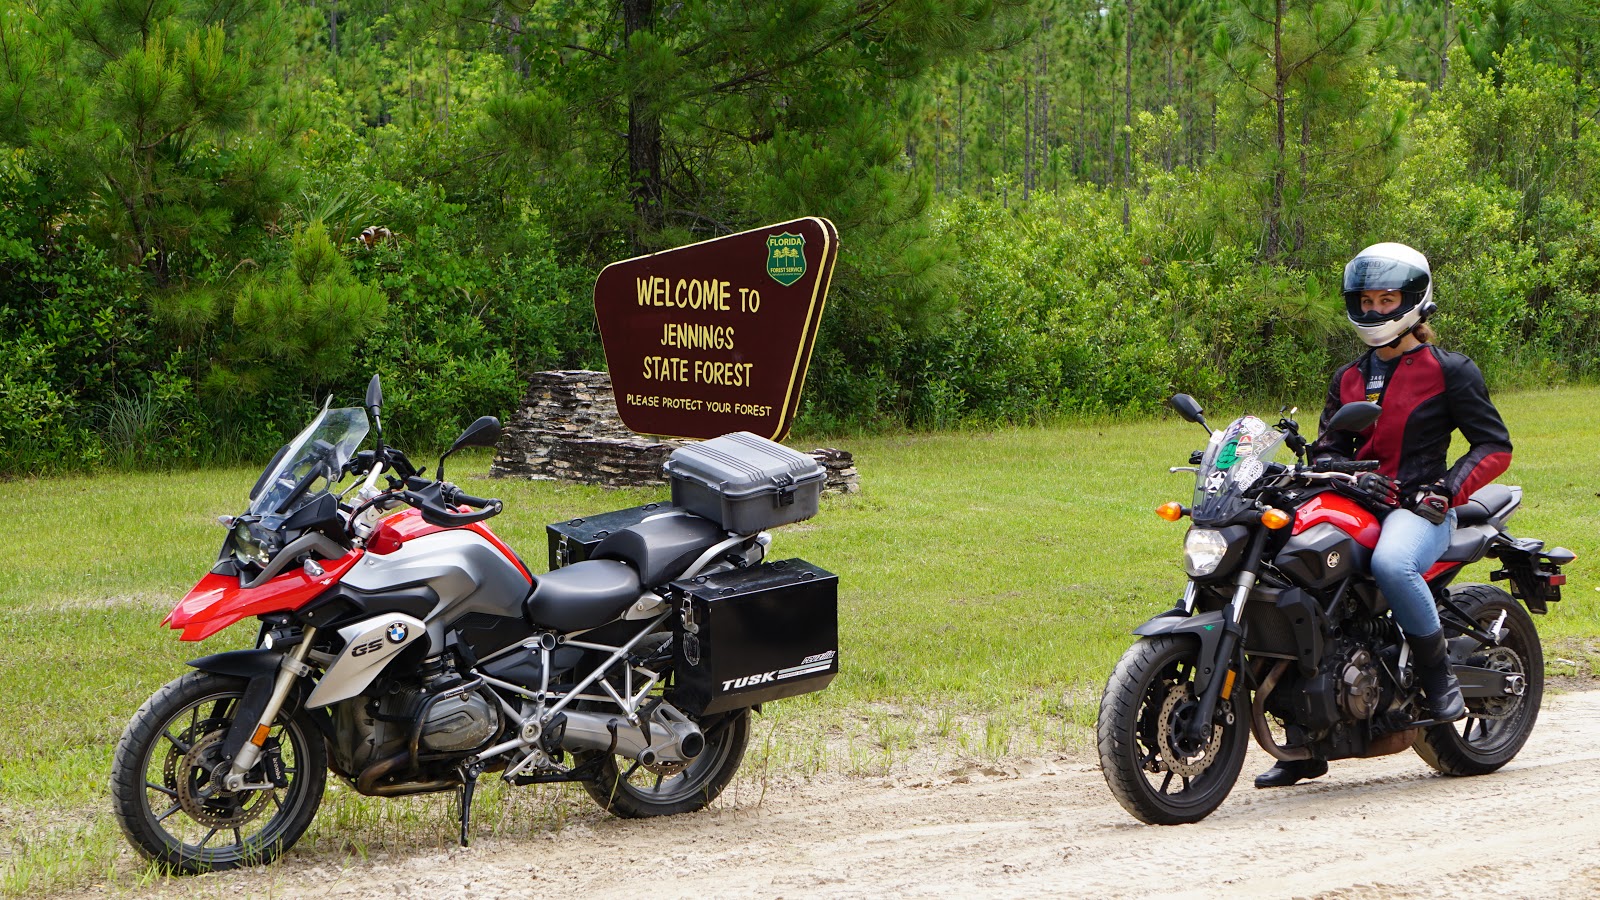
Adventure bikes and street bikes can do most of West Jennings if you're careful!

The ride to the start of this track is really quite pleasant itself depending on which direction you choose to come from. There are some sections of 103rd Street and Normandy Blvd that may make one feel a little uneasy due to the local crowd being a bit rough around the edges, but things clear up five to ten minutes down the road where the trees take over. A left on to McClelland, then another on Long Branch will send you on your way to the entrance and info board for the forest. The pavement will have ended before getting to Long Branch, so make sure to stop and get your ride set up for dirt riding if you have that capability. Initially, the road is pretty well packed and graded with patches of gravel here and there, but it gives way to loose sand the closer you get to the entrance. Practice good technique on the way in so you don't end your fun before it even gets started.

Once you get to the sign, you have the option to continue going straight or hang a right through a gate that may or may not be open. Even though I've been past that gate more than a few times, I'm not even sure if you're really allowed to take vehicles back there, so we're just going to omit that section altogether for now. Going straight leads you deeper into the forest. It's very quiet back there and with any luck, you might be able to see deer or wild turkeys along the road. There have been a few times where it seems as though the turkeys would rather try to race me rather than fly away and it makes for a giggle inducing encounter. If you take the right indicated on the map to stay on Long Branch, you'll be in for an interesting trail that will eventually dead-end in rather sudden fashion. If you do decide to go that way and you think to yourself "things are getting tight. Should I turn around now?" you probably should.

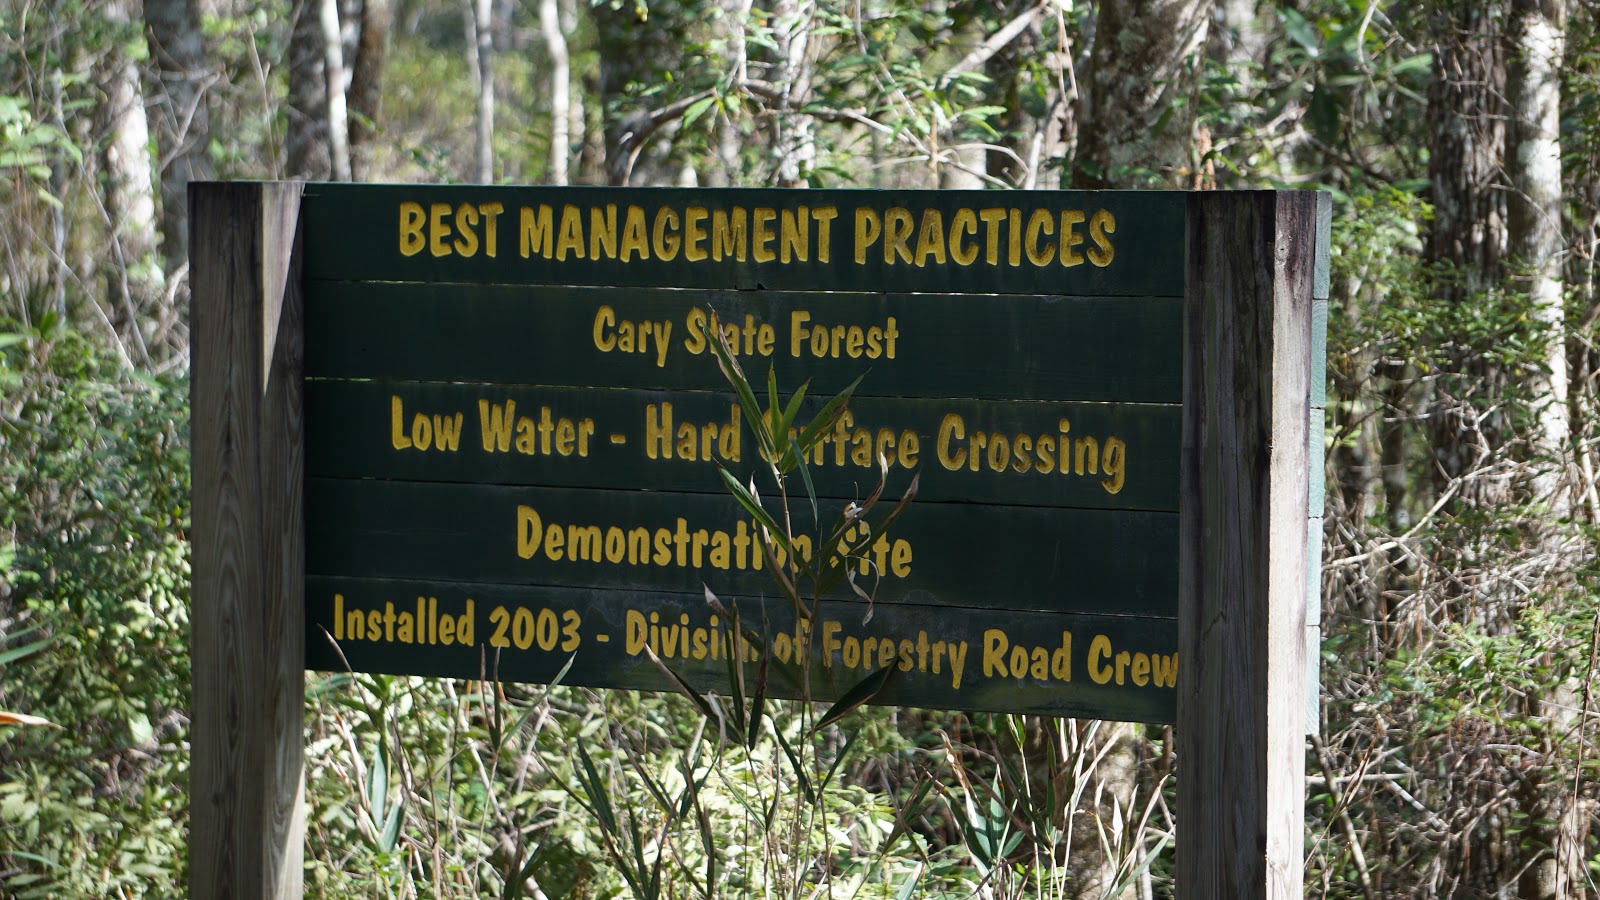
This .GPX track will take you past that right and continue on past Nolan Ridge Baptist Church. The first time I saw this tiny place I thought it was rather peculiar with it being so off the beaten path. I've also seen enough scary movies to know to keep my distance. Not long after the church is a water crossing that can vary from shallow to somewhat deep depending on the amount of rain in the area. I'm not sure if it's the locals or the Forestry service, but someone keeps dumping gravel to fill it in, but it keeps coming back, thankfully. If you get muddy on the trails past it, it serves as an excellent bike wash on the way out. Keeping right at what can best be described as a roundabout tree will take you to some small primitive camp sites, a picnic area, and rudimentary facilities. We're going to keep left.

This is the main water crossing leading to the rest of the trails. It varies in depth but the crossing is easy.

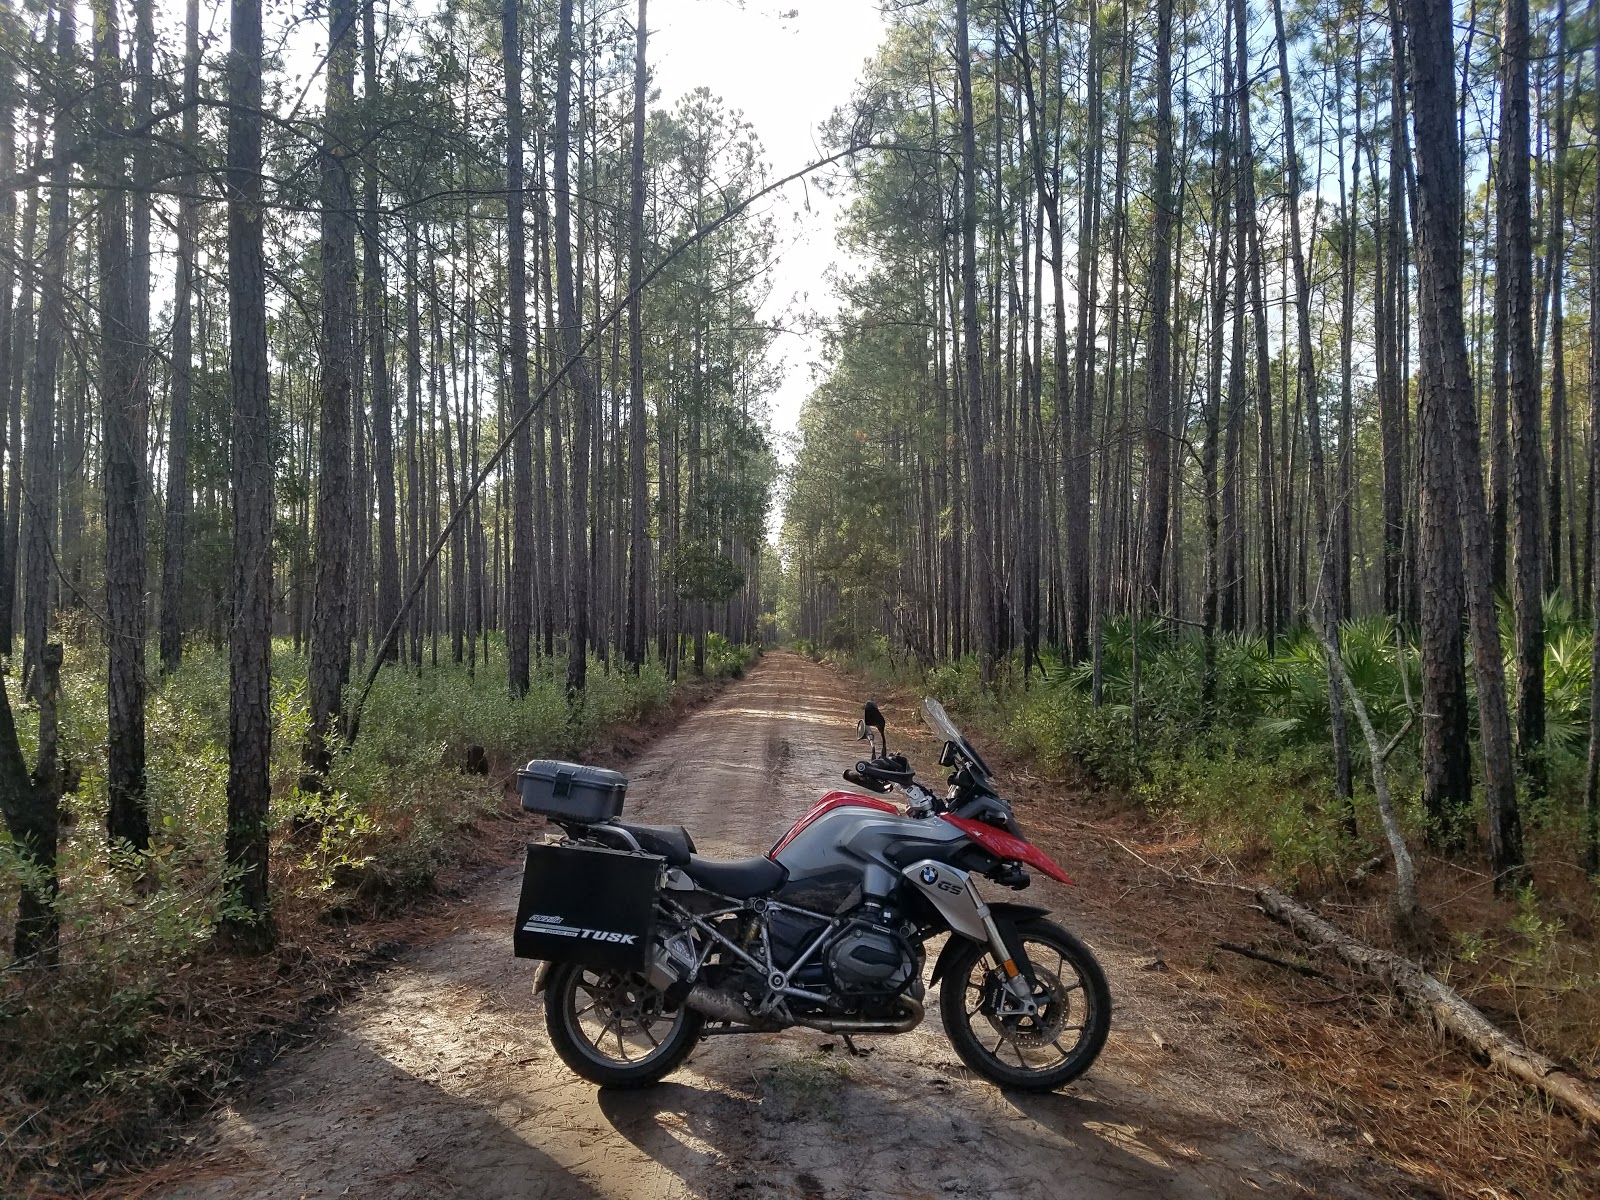
Some trails are used less than others. Be prepared for varied terrain.

The road here varies from soft sand to gravel to clay. Depending on how soon you decide to visit after a rain will determine if you have great fun or a difficult time. Larger 4-wheeled vehicles can cut some pretty deep ruts (between 6 inches to a foot and a half plus the depth from road surface to the surface of the water) that can turn into small ponds that are always difficult to see the bottom of. Couple that with slick, muddy surfaces and you have yourself a time that could be considered less than boring. I've done these sections many times by myself and I wished I would have brought a friend along to help when I'm in a tight spot, but those are slim pickings these days.

Following the .GPX on the main track will take you to a yet another dead end (shocker) but there are some smaller trails that are marked as "Closed to Vehicles" but are still clearly being used. Use these at your own risk. I was in search of a pass through to the eastern section of Jennings at the time I made this track, so that's why I decided to take them. There aren't any, in case you're wondering.

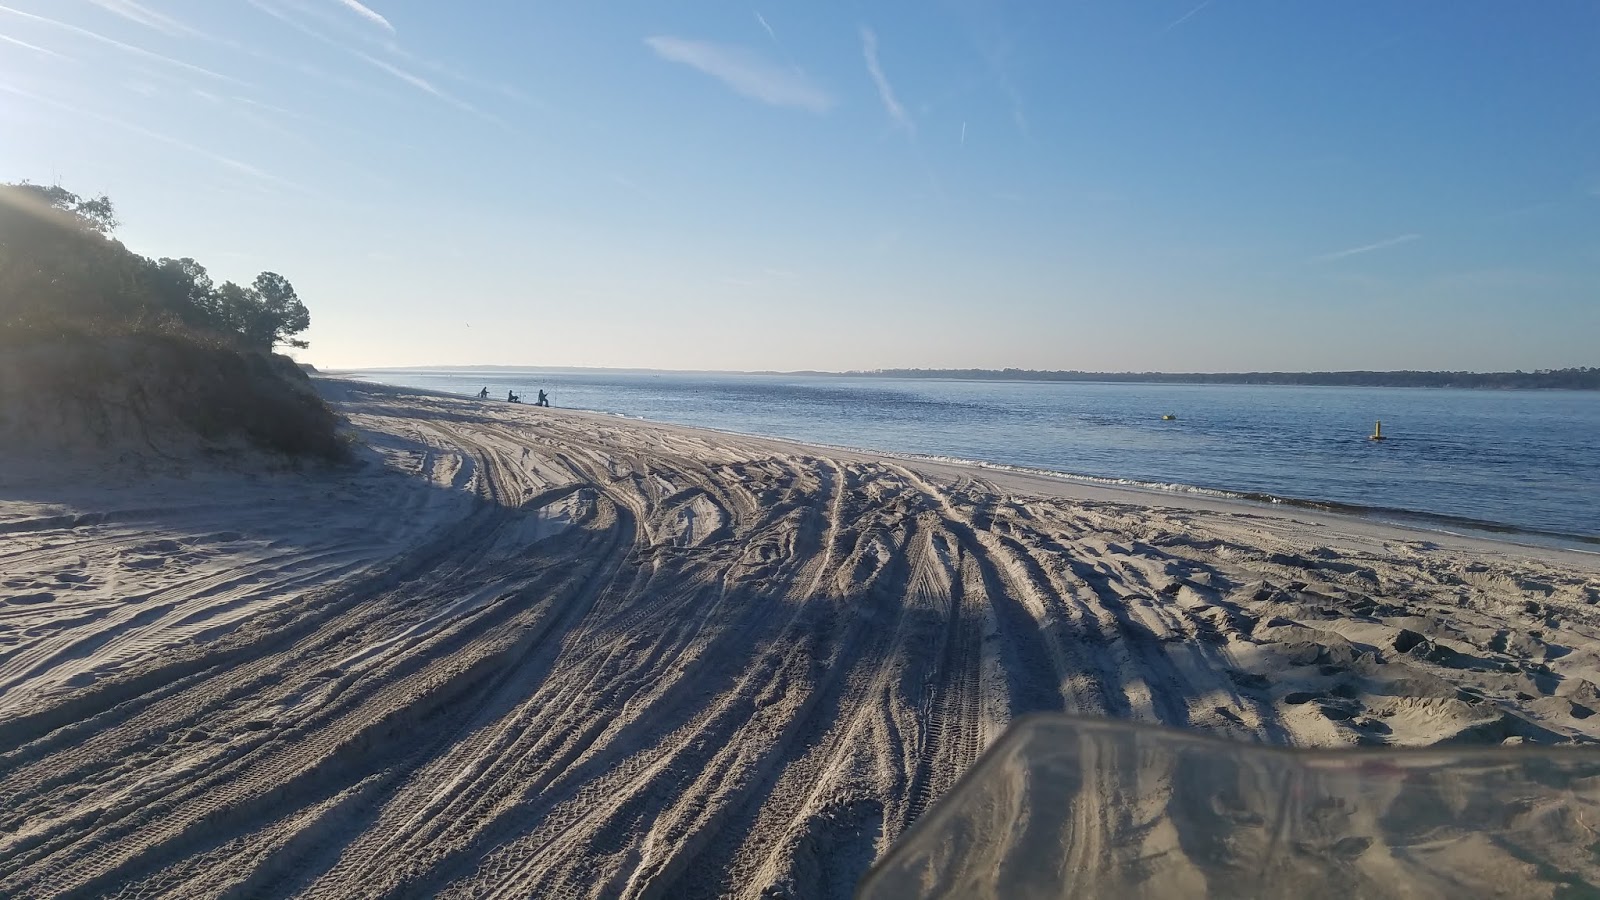
Altogether, Jennings is a great place to ride and relax. The area is subject to controlled burns from time to time so it may be closed during particular times of the year. Wildlife is abundant, including bears. I haven't seen one out there yet, but make sure you have or are educated in the the necessary measures to deal with one should that situation arise. The picnic area and restrooms at the end of Long Branch are a nice perk that you don't usually find so I use them whenever I get the chance. Those picnic tables are pretty comfy for a quick nap.

Jennings State Forest (Part 2) will be pushed next week and cover the southern (and superior?) section.

Happy riding!

- For more information on Jennings State Forest, please visit this website.

- To download the .GPX file for this ride from dualsportmaps.com, click here.

Saturday, March 9, 2019

NE FL ADV and Motorcycle Tours: What we're all about.

It started out as a simple idea created during a conversation with my wife while we were walking the dogs one evening.

We've been doing all of this exploring, mapping, and tracking of Jacksonville and it's surrounding areas and we usually prefer to eat at local establishments rather than big chain restaurants, so why not show people around in person but do it in a way that we love; on a motorcycle. Jacksonville goes by many monikers, but "The Bold New City of the South" is one that immediately comes to mind. It's growing faster than it can handle, but with that growth comes new and interesting thing. As with any city, there are things that you can get here that you can get anywhere else and it's vistas are just about as diverse as the people that live here. What we'd like to try and do is help make Jacksonville a city that people don't just pass through, but rather stay and explore.

This especially goes for the motorcycle scene. I can't tell you how often I see groups of riders from elsewhere just passing through town on their way south to Daytona or Orlando, all the while missing what Jacksonville has to offer. It can be more than a little upsetting because there is actually a lot to do here. You just have to know where to look.

So my wife and I took our idea and are now taking steps to make this into something that we both (and hopefully you, too) think can turn into something quite successful. It's going to take some work, but we hope to broaden the market when it comes to motorcycle tourism here in Jacksonville. So without further ado, I present to you Northeast Florida ADV and Motorcycle tours! Please take a moment to visit our website. Click, share, spread the word, and follow us on Instagram @nefl_adv_and_motorcycle_tours! Thanks!


THE BIG PICTURE

Northeast Florida Adventure and Motorcycle Tours is the first of its kind in the region. Our adventure tours showcase the beautiful forested areas of northeast Florida and our street tours highlight both the new and the old of Jacksonville and surrounding areas. Both types of tour include a food or coffee stop with an emphasis on local fare as Jacksonville is one of the fastest growing cities in the southeast and has much to offer. Tours are all inclusive (excluding fuel and alcohol purchases) so you can relax and let our guides show you the way to a good time.

HOW IT WORKS

First, you will need these items in order to go on one of our tours.
  1. A valid driver’s license with motorcycle endorsement
  2. Proof of insurance (if applicable)
  3. Your signed liability release waiver (this will be emailed to you)
  4. Your motorcycle
  5. Proper gear (helmet, jacket, gloves, boots, and pants. NO EXCEPTIONS!)
Choose the type of tour you would like, the date you would like to take it, and how many people will be in your party (6 motorcycles maximum). Please refer to the “Upcoming Tours” link to view availability.

Once we have this information, we take care of the rest! Before your tour, we will ask you what kind of food or drink you are in the mood for that day so our guides know where to take you. Depending on the size of the group we may call ahead to where you are going, so please refrain from changing your mind during your tour. Everywhere we go is excellent so no need to worry! All tours are led by guides that are Jacksonville natives and are well traveled in the areas you will be visiting. Guides will also be following pre-loaded GPS routes to make things easier (especially for the adventure rides) but since Jacksonville is a living, breathing city, a detour may be necessary here and there. Tours are all inclusive, just follow your guide and enjoy your time on your motorcycle!

OUR GOAL

Jacksonville is a very big place and we would like to try to expose you to just a small piece of what it has to offer. What better way to experience something like that than from behind the controls of a motorcycle! Adventure tours will highlight the dense, protected forest areas that pepper the area that make for some great off road riding suitable for all skill levels. The main idea of these rides is to immerse yourself in nature and enjoy it, not destroy it. Sustainability is key if more people are to enjoy these areas. Street rides will take you through some of the most scenic roads of Jacksonville and surrounding areas, giving you an idea of the diversity this great city has to offer. Since we are strong supporters of local fare, we will do our best to make sure you enjoy some of the best food and drink Jacksonville has to offer. With all that said, we mostly just want you to have fun!

We would greatly appreciate any an all help or feedback concerning our endeavor. If you're up for booking a trip, all tours are 50% off if you book before the end of March! Use the promo code GRANDOPENING at checkout.

Friday, March 1, 2019

Gear Reviews: Bell MX-9 Adventure Helmet

Since all my previous riding experiences were street based, I had no idea how important it would be to have a helmet suitable for taking things off road. The first time I did my first off road trek was shortly after I got my GS and I still had not purchased anything that was even remotely "adventure" oriented aside from the bike itself. The helmet was a Shoei RF1200, the gloves were gauntlet style, and my boots were some variation of a Dianese street boot. I had done some Googling and found some trails in Cary State Forest not too far from where I lived, so I donned all my street gear and off I went thinking I was going to be alright.

Being as wet behind the ears as I was, I had no idea what I was about to get in to. It had to be around August, which is right smack in the middle of one of Florida's rainy seasons, and it must have rained quite a bit a few days prior with the state of things. There were mud pits and water holes abound upon my arrival. But not to fear! I was on an adventure bike, right!? Many lessons were learned that day like "just because you have an adventure bike doesn't mean bomb into a water crossing when you really don't know how to do it yet" and "if you try to wear a RF1200 on an adventure ride into the woods in Florida in August, you just might suffocate and die." Don't get me wrong, the RF1200 is probably one of the best helmets I've ever had, but it's most certainly meant to be worn when you're moving at a good clip; not when your stopped trying to get your new-to-you heavy bike out of the mud and you have to keep the visor closed so your eyes don't get attacked by mosquitoes.

I met my wife for coffee afterwards and regaled her with the fun I did actually have, but I needed a new lid to better facilitate adventuring that wasn't going to break the bank. A little bit of research and a visit to good old Revzilla and I found the Bell MX-9 Adventure.

The MX-9 has been my adventure helmet for about 2 years now.
I was overwhelmed at first because I had never even though about looking for an adventure helmet and had no idea what to look for in one. The price point also had me on edge because the only real adventure helmets I had ever seen were either Shoei or Arai and I certainly didn't have the money to shell out for one of those. Luckily, the adventure market is booming and manufacturers are jumping all over it providing a multitude of options for buyers to choose from. 

So why the MX-9 Adventure?

I'll admit, one of the first things I was looking at was the price. At $200, there weren't many helmets that had decent reviews that could beat it. Coupled with my ZillaCash and an additional dark tinted visor, my bottom line at checkout was something like $230-$240. Compared to the hefty price tags of the Shoei and Arai lids, regardless of how bad I wanted one, the Bell was looking pretty attractive.

As far as fit and finish go, I chose this helmet because I tried on the regular MX-9 (not the adventure trim) at my local Cycle Gear and it fit my head like a glove. I would probably be considered long oval and large is usually the size that I go for. As far as the Cycle Gear guy was concerned, the adventure was exactly the same as the one I had on, it just had a visor. A lot of the reviews mentioned it and the salesperson confirmed it as well, but even with the visor on the adventure model, a decent set of goggles could be worn. White was one of the solid color options that kept my overall price down (I think the other was gray), but there were a few other liveries available that will add a few extra dollars if you choose to go with those.

When I got my Shoei, I was amazed at the increase in peripheral vision compared to my previous helmets. You can imagine my attitude toward experiencing the view from an adventure helmet. With the chin bar so far away from your face and a visor that can pretty much flip up and almost completely out of the way, the view port is massive. Ventilation wise, it's pretty open to the elements. The only vent that can actually close is the main chin bar vent, but I really only open that on the hottest of days or if I'm off road.

While it does check the boxes for most of my requirements, I did have to sacrifice some things for the sake of price. For starters this IS NOT a quiet helmet by any means. The shape is only so aerodynamic, even with the peak in the "low" position, so ear plugs are a must for longer rides. While the visor and visibility are huge, the top of the visor does not sit against the seal of the helmet, allowing water to drop into the helmet from your forehead. This leads to small pools of water collecting in the little pooches Bell had to implement at the bottom of the visor to correct for optics. In Florida this can be quite bothersome since it rains more often than not. There are other visor options out there, including one made for snowmobiles that equates to a non-removable PinLock system to prevent fogging. Something to consider if you live in northern climates.

There is room enough for a communications system if you have one. I was able to fit my dinosaur of a Sena SMH-5 system into the helmet in about 15 minutes, taking my time. My Sony ActionCam mounts fit well to, although my favorite helmet view is right on the peak. If you have any other dongles or accessories, I'm sure there's plenty of real estate on the MX-9 to add them. There's plenty of room for stickers, too so you can easily add horsepower to your ride with minimal effort.

Even though this helmet has served me very well over the past two years, I'm in the market for something a little higher tier. It's not that I don't like it anymore, but I'm looking for something a tad quieter, has a better seal on the visor, and perhaps has a modular element. Alas, the MX-9 has been wonderful up to this point and doesn't show any signs of giving in anytime soon. If you have the coin to splurge on an Arai, Shoei, or even a Schuberth, go right ahead. But if you're looking to get something entry level that can get the job done, the Bell MX-9 is my recommendation to you.

If you're interested in looking into the specs directly from Bell click here.

Sunday, February 24, 2019

Adventure Series: Belmore State Forest

If you do not have a motorcycle that you are confident operating in off road settings, DO NOT attempt this ride.

The smell of Florida mud getting baked on hot exhaust headers was filling the air. It's seems unseasonably hot and humid with it being February creating a sheen of sweat on everyone's brow. The trail seemed easy enough at first and since everything prior to this particular section was beginner friendly, we all thought we could make it through. Riders were competent. Tires were of the correct nature. But the fear of someone being overtaken by the boggy water crossing before us that was of questionable depth deterred the group. A brave soul on the bulletproof KLR had somehow already made it across lifting our spirits, but the boss had already spoken. We were to turn around and do everything we had just fought through again. The concern lay not with everyone else's bike, which were mostly of the GS or GSA variety, but a loaner G310GS. While it tackled the mud like nobody's business, the exhaust might be too low and dip below the water line; a risk the pilot did not want to take. Turning a set of heavies around on a muddy trail that is probably about seven feet across is no easy task, but we did it and made our way back out to the two track we probably should have stayed on.

Now that I've spooked you enough, let me tell you how wonderful the rest of Belmore State Forest is.

Coot's Shanty offers a place to park so you can take some of the available footpaths

In all honesty, these tracks are some of the best you can find in northeast Florida. Tucked away in Keystone Heights, this 8,700 acres has enough for whatever it is you're interested in. It's far enough "out there" that you can't hear any main roadway traffic and it's splendid. Hiking, mountain biking, and general offroading can be found in abundance here. Nearly every time I've visited, some type of wildlife has made itself known, with the most interesting experience coming in the form of an adorable little wild pig. I'm well read enough to know not to approach these guys as they can be quite aggressive, but I'll be damned if that thing didn't make me giggle a little bit. There are two entrances to the forest, but the north one is the easiest to get to since we're coming from Jacksonville. All of the main trails are in good shape, so as long as you stay on them you should be alright. The account that I opened with is the result of our group heading off onto one of the trails that was not considered an "open road" on the map and had not been scouted previously.

Staying on the main trails offer your best bet for a nice ride through the forest.
If you happen to try and tackle the forest after it rains, you can be sure that there will be plenty of water holes for you to negotiate. Due to the fact that things can be quite muddy in the area these water holes look more menacing than they actually are, so you can ride through them with confidence if you have the correct tires and don't mind getting a bit wet. Trying to making it through wearing something more suitable for the street may end up with you getting a bit dirtier than you bargained for.

The Ducati Scrambler living up to its namesake. A big smile is apparent under that helmet! This rider managed to scramble completely off the trail and into the woods later on that morning.

This water crossing proved easy pickings for a KTM Super Adventure.

The Super Tenere handles itself quite well. It sounds good, too.
Following the line of the .GPX file will take you on a fairly safe route around the forest, but avoid the area highlighted in yellow unless it's been pretty dry for a few weeks. I think it's safe to say that any amount of rain would cause the ever-present offshoot trails, like the highlighted one, to become a muddy, difficult mess.

Coot's Shanty offers an area to rest or collect yourself after getting onto the trails and, if I remember correctly, there might be a few other recreation areas to take a break at as well. If you find yourself on Cripple Creek Road, there is a wonderful little bridge that makes for an excellent photo opportunity. Depending on how much rain the area has seen, the water level can range from a few feet below the bridge to almost even with the bottom of it, complete with a rather vigorous current.

The bridge at Cripple Creek Road

The trusty KLR having it's fun since Kawasaki has ended its lineage.
Depending on how much riding you're planning on doing, Belmore might be good enough for a morning adventure ride, much like our group did. If you're keen on tackling more trail, Etoniah State Forest is easily accessible from the southern entrance down Middle Road. As with all these write-ups and trails, approach them with caution and assess them according to your skill level. In my opinion, the main trails can be done by beginners to intermediates with no issue. It was quite the melting pot of bikes at the start of our group ride when this track was made that included a Honda CB500X and a Yamaha FZ-07 (both on street tires) who didn't take any spills at all. That should give you a pretty good idea of the difficulty of this route. If you do try to go off the beaten path, things will get difficult. I'll let these past few photos speak for themselves when it comes to that...

Some members of the technical group weren't exactly dressed for the part.

There was no getting around throwing up a big rooster tail of mud behind you.

The little G310GS that could! It handled the mud better than the bigger bikes due to its light weight.

I was unaware at how filthy everything actually was until I got home.
- To find out more about Belmore State Forest, visit their website. It has a nice map to cross reference .GPX files with.

- Due to how impressive the performance of the G310GS was on this ride, I'm including a link to more information on it here.

- Click here to download the .GPX file for this ride from dualsportmaps.com

Thursday, February 14, 2019

Adventure Series: Riding on the Beach

If you don't have a motorcycle capable of operating in sand, DO NOT attempt the beach portions of this ride.

Seeing motorcycle riders in photos or videos where they are riding along a vast, empty beach always stirred up a lot of envy in me. A Google search for "motorcycles riding on the beach" yields a plethora of images of people that appear to be living their apparent best life and generally having a great time. Needless to say, I really wanted to find a place around here where a photo like that could be taken. Amelia Island and Huguenot State Park are the only places that you can take a vehicle out on the sand here in Jacksonville, so that's where we're headed.

A few important things to keep in mind...
- These are both popular beaches. It's recommended to get out there early or later in the day so you don't have to deal with regular beach-goers. If you do try to go in the afternoon, mentally prepare yourself for crowds.
- During certain times of the year, both parks have sections of beach roped off for shore bird nesting season. Respect those boundaries since we're already basically trespassing on their home turf anyway. If you do visit when the birds are nesting, you can walk these areas. I highly recommend it as the volume and variety of birds is quite amazing.
- The tides play a role in how many routes are available, especially at Amelia Island. High tide usually means a single route of nasty, loose sand close to the dunes. Low tide means more beach to be utilized. Plan accordingly.

The track starts at Amelia Island State Park, the northern-most point for this particular ride. If you're trying to find the park's entrance by sight alone, make sure you're paying attention because the sign is rather hidden.

Keep an eye out. This sign is rather tucked away.
Since we enjoy our state parks and want them to stay around for a while, make sure you pay your dues at the booth ($2.00 a person, I think) and head on out to the beach. The sand here is very loose right off the bat, so don't go charging out like a hooligan. Yet another reason to take it easy is that many people park out on the beach to fish or swim and I'm sure they wouldn't appreciate someone barreling around scaring the fish away or interrupting their good time.

You'll have to deal with loose sand right away at Amelia Island.
There is currently a dredging operation going on at the Southern end of the point to try and help with beach erosion, so there is a section that isn't accessible at the moment. Small pass-through trails will allow you to get to the east side for now. Once you're around the point and heading north again, you can only go so far before seeing the signs that indicate the start of American Beach, which does not allow regular vehicle traffic. Take care on this entire stretch before American Beach because the sand is going to be very loose and could make for quite the workout if you don't know how to properly manage it.

Who needs a gym when you have sand to tackle!?!

I find the height difference between these two signs amusing.
Once you're done at Amelia Island, simply double back the way you came and head on out to A1A. Our next stop will be Huguenot Beach, which is a little easier to ride.

Huguenot Beach is only ten or fifteen minutes south of Amelia Island. The entrance is easy to find and is well marked. While Amelia Island kind of operates on the honor system for park dues, Huguenot does not. You will have to pay a whopping $5.00 to gain access to the beach, but this gives you access to picnic tables, a family beach area, and a small nature center.

Huguenot's sign is much easier to see than Amelia Island's.
After you get through the gate, follow the signs for beach access. Views of the north side of Mayport Naval Station are abundant and very, very cool. Seeing all of the ships and helicopters on your way in could bring out the kid in the oldest individual. Take care to heed the speed limit as best you can since it is "strictly enforced." It would be nice of you to do so through the family beach area anyway, since, you know, it's the family beach area. Once out to the main beach, you'll have much more room to move around, and it is glorious.

Huguenot's beach is quite large. It will fit many rows of cars on the busiest of days depending on tide level.
The track I took first headed south to the rocks then looped around so I could rocket north and be close to the water. It's an awesome feeling, that. Since it was early in the morning, I practically had the beach to myself, but I was still respectful, as you should be too. Enjoyment was had, but within reason. In the non-nesting season for birds, you can ride all the way around the point, but be wary if the tide is out. There is a mini-flood plain on the west side that can sneak up on you, as it did me, where the sand is loose and wet. It looks easy enough to do, but if you find yourself on it, KEEP MOVING or your bike will sink into the muck. You won't lose anything, it'll just be a bear to get out.

While these may not be the world's biggest beaches, they're still relatively close to home and they'll get the job done if you happen to get the itch to ride your motorcycle close to or in the Atlantic Ocean. Amelia Island is the more advanced of the two beaches due to narrow passages and extremely loose sand, with Huguenot being more beginner to intermediate friendly with larger spaces and harder packed surfaces. If you're wanting to try these but have never really ridden on sand before, take some time and practice out at Imeson Park. You'll look a lot cooler to bystanders if you aren't flopping all over yourself trying to keep your machine underneath you as you make your way down the beach. If you need more information on Imeson, a link will be at the bottom of this post.

Oh. I also have my own motorcycle beach photo now...

A dream, realized.
- For more information on Amelia Island State Park, please visit their website.

- For more information on Huguenot Memorial Park, please visit their website.

- To find out more about Imeson Park, an excellent place to learn how to ride in deep sand, click here.

- This ride overlaps with The Fernandina Ride. For more information in it, click here.

- Follow this link to download the .GPX file for this ride on dualsportmaps.com.

Wednesday, February 6, 2019

Adventure Series: Cary State Forest (Big Bike Friendly)

If you do not have a motorcycle capable of operating off road or in deep water, DO NOT attempt this!

The first set of tracks that I posted for Cary State Forest weren't exactly a cake walk for anyone that has a big adventure bike. It was my first time trying that particular route myself, so I learned a few things along the way. First and foremost; give the rain more time to dry, especially if it's chilly out. Normal Florida heat wasn't there to work its magic, so the evaporation rate was much slower than I anticipated, leaving a lot more standing water than what was hoped for. But that's what adventure is all about right?! Overcoming adverse conditions with odds not necessarily stacked in your favor? Sounds about right.

This track is meant to be of a more relaxing type for those of you that just want to get out and maybe enjoy a nice evening off road jaunt and watch the sun settle into the trees. Try it sometime. It works wonders. To give you a sense of scope for the difficulty of this ride, I was able to do this in almost exactly 50 minutes after a pretty physically demanding day at work. That includes the one time I got stuck (my own fault) and the few times I stopped to take photos or look at the map. Be warned, there is a swampy section that some may not like. Keep in mind that all that rain water we've been dealt lately is still hanging around, so this may be different depending on what time of year you choose to do this. I've marked the trouble area in yellow on dualsportmaps.com. If you pull up to the intersection where blue ends and yellow begins and you see standing water on the road, don't even worry about going down the yellow track unless you're up for a challenge. Follow the blue route for a more easygoing experience.

You'll be starting out at the west entrance for this one, but as most/all of these rides, it can be taken the other way. Follow the line past the facilities and forestry station and head on into the woods. Some of these routes overlap with the previous track, but that can't really be avoided. Between the two, you pretty much have all of the trails covered. Keep going until you get to the intersection where the track goes from blue to yellow. Yellow is generally the universal color to indicate caution, so be wary if you decide to head this way. Things aren't bad on the road leading to the north perimeter road, it's when you actually get to the north perimeter road. Observe...

It seems that only the North Perimeter Road
has these treacherous water crossings.
Some of these ruts have been made quite deep
from trucks and Jeeps. Be careful!


Both of those photos were taken pretty much at the midpoint of the north perimeter road section. As mentioned in the caption of the second photo, some of the ruts are really quite deep due to other off road vehicles making their way through them. I'm not entirely sure how, but I was able to keep my socks dry going through these. So, if it's dry(er) go ahead and give the yellow section a shot. If it's been raining a lot lately, bypass the yellow area and keep going with the blue.

It seems that the Forestry services have been hard at work trying to tidy up the roads all over the forest, but the state of one of my favorite roads has me downright sad. Before, it was a decent dirt track that was, in all honesty, very picturesque.

The eastern section of Cypress Pond Road was stunning.
Now the road surface has these rocks all over it. It's quite loose so be careful.
Since the "improvements," there is now a layer of stone pieces that kept me at attention the entire time. These stones like to slide around one another quite easily. By looking at it, one would think a surface like this would provide plenty of traction, but it doesn't. Use caution going over it if it's still there, because falling on that would be much less than fun, for both you and your bike.

After you make it over the stones, you'll get to some hard tack. The road itself looks like it's been brought up a good 2 or 3 feet because some of the trickier mud pits no longer exist. This makes things easier to traverse, but also takes away from the fun that could be had. A blessing and a curse, I suppose. Head south over a dainty little bridge that I vaguely remember crossing during a Trans-Florida rally and you're almost done.

The metal grates on this bridge move a little bit.
The remainder of the ride is rather straightforward. Road improvements make things easier on the main track, but there are little spurs here and there that are unfinished. I wouldn't dare try to tackle any of those with how wet it's been lately. Keep an eye out for heavy equipment being operated by the Forestry folks, although it would be pretty tough for them to sneak up on you with those giant machines.

So there it is. The big bike friendly Cary State Forest track. You could probably integrate some sections of the other ride into this one to make things a little more interesting or make for a longer ride, but this one is certainly the more leisurely of the two. If you don't know what I'm talking about, there will be a link you can follow below. As with all of these tracks, participate in these according to your skill level, but I would say that most novice riders could do this one, WITHOUT the yellow portion.

Happy riding!

- To get more information about the original Cary State Forest ride (that is more difficult), click here.

- Follow this link to download the .GPX file for this ride from dualsportmaps.com

Friday, February 1, 2019

"Adventure" Riding Apps

Operating an adventure bike can get expensive. Accessories, parts, gas, repairs, services, and the list goes on and on. One of the priciest bits can be a GPS unit that can be mounted on your bike. Luckily, people carry around handheld GPS units with them all the time in the form of their cell phones! This post is meant to potentially educate those that may not have the capital to buy one of the expensive units on how to turn your cellphone into quite an excellent adventure tool. If you're planning on going WELL off the beaten path, a purpose built GPS unit would obviously be the way to go, but you can still use your phone if you're staying kind of close to home.

Note: I use an outdated Android Samsung Galaxy S7, so links to the apps are going to be to the Google Play store. For those using iPhones, you will have to search whatever your marketplace is in order to download them...if Apple lets you.

Google Maps

Ah yes. Good old Google Maps. The system that superseded MapQuest in my younger days so quickly can essentially turn your phone into an awesome little way finder. I won't harp on this one too much since nearly everyone I've ever talked to has this installed. While Maps does do a good job at telling you the quickest way to get from point A to point B by reading the location and speeds of other Google users phones, it's not all that great for those that want to take things off road. Not all trails that you may want to take show up on the screen, to put it simply. There have been quite a few times where the app shows me that a trail ends even though I'm sitting there, in person, looking at the continuation of the trail in question. As a novice, I even tried using this up in the Smoky Mountains and got lost many a times when the maps couldn't download due to bad cellular service. It was just my little arrow in a sea of green that was the forest I was in. All in all, while Maps is a good way to get around town and maybe hit some unpaved roads that Google has decided to include, I would not depend on this solely for your adventure riding needs as it could potentially become unsafe.

If you don't have Google Maps on your phone (which I would find hard to believe) you can download it from the Google Play store here.

GPX Viewer

When I discovered the magic of the .GPX file, there was a short period of time where I couldn't figure out how to open them on my phone since I did not have an actual GPS unit. A little searching led to this little gem right here. GPX Viewer, as it is aptly named, allows you to open .GPX files on your phone, complete with waypoints that others may have included. I was still able to use this to follow a track through the mountains even though cellular reception was dropping out and the map wasn't completely loading. Since the line was already there, I just followed that. There is another app that I will cover next that allows you to do the same thing, but I prefer this app when following tracks because it just looks better. Most of my .GPX files are saved to my Google cloud so I can access them whenever I need to across a multitude of devices. Whenever I want to open one, I my go to my .GPX file folder, select the three dots on the right for options, choose "Open with," and your apps that have that capability will pop up at the bottom of your screen.

All of my .GPX files are in the cloud
 for easy access across devices.
"Open with" gives you the ability to choose
which app want to open your file.


Once your file opens in GPX viewer, this
is how it will look. Zoom in and out to make
things easier.
The drop-down menu gives you options.
"Follow GPS" and "Rotate Map" are
particularly useful.


There is an option to purchase GPX viewer Pro which gives you the ability to record tracks as well, but I had found a better option that was free that I'll review next.

If you want to download GPX viewer for yourself, you can find it in the Google Play store here.

Geo Tracker

GPX viewer is great for if you want to follow a track, but what if you're ready to make your own? Enter Geo Tracker. This app gives you the ability to create and share .GPX files that can be used elsewhere. Geo Tracker is a recent discovery for me and I was rather excited to find that it was free to download. It does say that it "offers in-app purchases" but I personally have not discovered what for yet. The concept is simple enough. If you want to make a track, just hit the record button down at the bottom and it'll start to record your route automatically. You have the option to pause or stop the ride if you wish. When the ride is done, just edit the information through the drop-down menu. You can also drop markers before you go on a ride in order to basically map where you want to visit. This gives you a nice little challenge if the route turns difficult. When I want to get the .GPX file in order to upload it to dualsportmaps.com, I "share" it to my Google drive, then it's readily available on my Chromebook. The UI is intuitive and easy to use, so you can pick up on things quickly should you choose to use it. I do not prefer to follow tracks using this app because the past few seem to upload strangely.

Dropping and labeling markers can help
you map your route.
Each recorded ride is saved for easy access
and can be edited and shared.


All of my rides as of late have been recorded using this app since it makes things so easy, and easy is enjoyable. I would highly recommend this app to anyone that is looking to make GPS tracks quickly and easily.

If you want to download Geo tracker yourself you can find it on the Google Play store here.

Where2Ride

This may not be a dedicated adventure app, but it could have the capability to be one if more people participated on it. I found this one since it was being promoted by Cycle Gear. The concept is relatively simple. People upload rides and events to the app and others can participate in them. The more you participate, the more points you get and you can win things through Cycle Gear. There are other "challenges" you can do by clicking around some, but I didn't really explore that much. Most of the rides appear to be more street oriented, but since you can upload .GPX files, it stands to reason that there could be an adventure portion to it as well. That being said, I have not been successful in uploading an adventure track yet. Maybe you'll have better luck.

If you want to download Where2Ride for yourself, you can find it on the Google Play store here.

Rever

Another app promoted by Cycle Gear some time ago, this could also serve as a reasonable launching point for some adventure rides. Most challenges require you do travel some distance or visit certain places, but I'm fairly certain that adventure asides could be found along the way. This is supposed to be an all-in-one gig, so you may be able to get everything you want to do done right in the app. Although I haven't used it in in a while, I figured it would make a good addition to this list since it is one of the few motorcycle-centric apps out there.

You can download Rever from the Google Play store here.

There you have it. The poor man's tool kit to turning your phone into an adventure motorcycling tool, if you will. Did I miss any obvious or better options that you use? Let me know!

Happy riding!

Wednesday, January 30, 2019

Adventure Series: Cary State Forest

If you do not have a motorcycle capable of operating off road and in deep water, DO NOT attempt this!

Cary State Forest was one of the first places that I visited after I bought my GS. A quick Google search for areas in Jacksonville that can facilitate off road riding pointed me in it's direction. I was very wet behind the ears when it came to riding a motorcycle on anything besides asphalt, so this seemed like a pretty good place to start based on the reviews I read. Now, two years later, Cary still serves as a place I like to go to get away, practice adventure riding skills, or just listen to the wind blowing through the trees. 

This trek starts on the east entrance to the forest and ends on the west side in Bryceville, but it can be ridden in either direction. If you do happen to try this on a larger adventure bike, be aware that some of the sections are really quite difficult. GSs, Africa Twins, and some of the larger KTMs might struggle due to their weight, but if you are familiar with your adventure riding techniques, one would be able to do everything. Walking next to your bike while throttling it through water and loose, muddy sand immediately comes to mind. We'll call it the "unmounted power-walk." One should also keep in mind that I chose to take this route a few days after it rained for about 16 hours straight. Let it be known that I have learned my lesson.

The unmounted power-walk might be needed for bigger bikes through some areas
Photo credit
In order to start on the east side of the forest, you need to find the very unassuming entrance at a bend off of Garden St. It wasn't until a Trans-Florida rally last year that I realized this even existed, so I figured I'd make use of it again for this track. Should be easy enough for you to find after looking at the .GPX and dropping a pin on whatever navigation app you are using.

It's not a small sign, but if you aren't paying attention you might miss it!

Adventure awaits!
After you find the sign and take your pre-adventure photos, follow the line on your GPS for the first few roads. It seems that the forestry folks are tidying up the road a bit in these parts, which is nice. This should give you some time to get "warmed up" for what's to follow. Following the line through the first two right hand turns will take you to an area that didn't even really feel like Florida to me. There are no trees as it looks like the area is being harvested for who knows what. I would imagine that the sand here would be pretty fine if it was dry. Use caution and good technique here.


The flatness of Florida, accentuated

Keep going until you get to the yellow dot waypoint and where the track turns yellow. I did this for a reason! The small little path here looked easy enough, but it seems as though a creek had flooded its banks and left the area EXTREMELY swampy. If you're on a big bike, you see water, and choose to continue, prepare for that unmounted power-walk. I had to do it myself for about half of this little section. Smaller bikes would have a much easier time I would think, but I could be wrong. Do not fret if you have to turn around and backtrack. There are plenty of other trails to follow to get to the west side.

After you get through the bog (if it's wet) you'll have to pass through a hole in a fence to the right. I did not see any signs that mentioned trespassing or anything so I just went with it. The next few roads/trails seemed much more heavily used and therefore easier to traverse. There were a few hunting blinds and deer feeders here and there, so this was obviously a popular hunting ground. I would hardly call that hunting, though that's just my opinion. As you begin to work your way back west, the road quality diminishes greatly. These are probably primarily used for logging and were basically small flowing rivers at the time. The tannins in the water gave the illusion that it was much deeper than it actually was, which was only a few inches. A little off-putting when you're in an unfamiliar area. Once you get to the power line road things will get a little easier, at least for a little while.

You will encounter many muddy areas like this if you choose to take these trails after it rains. Welcome to Florida!
Power Line road will offer some water holes to pass through as you head south on it. Stay on the main track and don't wander too far off to the side trying to miss the water. The shoulders are VERY soft and you're more likely to get stuck in that than what you see on actual road. Ask me how I know... Resist the urge to drop the hammer down this road too, as there may be a sneaky pothole or slick mud patch that could ruin your day in an instant. Go around the gate you'll eventually come upon and keep following the line to the next caution area.

If I remember correctly, North boundary road, as it's called, had some pretty hellacious water situations going on. First, you'll run into this...


It may not look like much, but this almost came up to my knees.


I stopped to assess the situation and check the depth of the water since the forestry vehicles can be pretty tall. The last thing I needed was for this little pit to drop off into nothingness and I end up sinking my main mode of transportation. Luckily, the entire crossing is gravel and probably didn't exceed a foot and a half. Easy Peezy. Be very careful when going through the water holes as you continue west, though. The right side line I was favoring down the road was working out quite well and I got a little ahead of myself. The track I was on took a nosedive and spooked me quite a bit. It was a "keep the throttle open so water doesn't get into the exhaust" situation. It's never a good sign when you look over your right shoulder and you see a mini-rooster tail of water being ejected from where your exhaust should be. As luck would have it, whatever was on the bottom of that pit was grabby enough for my tires to catch and get me out of what could have otherwise been a disastrous situation. Point to be made: choose your line carefully. I think the left side would have been a little better, but don't quote me on that. I'd like to go and see what this stretch looks like if it ever dries up.

After this little caution area, the rest of the ride is a cake-walk. There are some minor water crossings here and there, but if you stay on the main track you shouldn't get stuck in the mud. Keep following the line until you get to the main facilities. Depending on what time you choose to undertake this ride, you could park the bikes and eat lunch at the nature pavilion if you've brought it with you. There are also campsites available complete with picnic tables and fire pits for those that are looking to stay a little longer. Restrooms are available and maybe showers, too.

Need some information on camping at Cary? This little area has all the info you need. There is also a campground host to answer your questions as well.
I'm not sure what else is in this building, but the little male and female plaques at least tell me there are restrooms.


If you keep following the line out of the forest you'll end up on 301. Head south and it takes you to I-10 where you should be able to find your way home from there. I wish there were more restaurants in the area, but it seems there are only a few gas stations peppered around. One of them does look like it has a small cafe attached to it, but it never appears to be open.

Another unassuming sign on the west side of the forest.
 All in all, it took me two hours to complete this ride of 17 miles. That includes most of the times I got stuck in the mud and forgot to pause the recording as I tried to reverse my stuck-ness. If it was dry, things probably would have progressed much faster. Please remember that larger bikes may have a harder time in some areas, especially the areas highlighted in yellow. As with anything, try to assess whether or not this ride fits your skill set. If you're just beginning adventure riding, I would say this one isn't for you just because of the amount and unpredictability of the water crossings. If it's been dry for a while, maybe give it a go. There will be a more beginner to intermediate ride of Cary that I'll do in the future. Until then, feel free to explore the area and make your own tracks!

Happy riding!

Follow this link to get to dualsportmaps.com and download the .GPX file for this ride.

For more information on Cary State Forest itself, click here.